Visual Studio Code is a very famous code editor that can be used to debug and build modern cloud and web applications. Here you will learn the steps to download and install Visual Studio code on your computer
Open the official website of Visual Studio Code
and then proceed to the Download for Windows section

By default I can see it’s showing “Download for Windows” because on my computer I am using the Windows operating system, but for instance, if you are using another operating system, it will show that specific operating system. There is a small scroll-down arrow button along with this, if you follow that arrow you will find more options for different operating systems and this is available for
- Windows
- macOS
- Linux x64
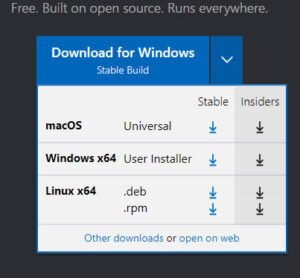
Click the button “download for Windows” and the downloading will automatically start on your computer, in case the download doesn’t start automatically you can also follow this link
https://code.visualstudio.com/sha/download?build=stable&os=win32-x64-user
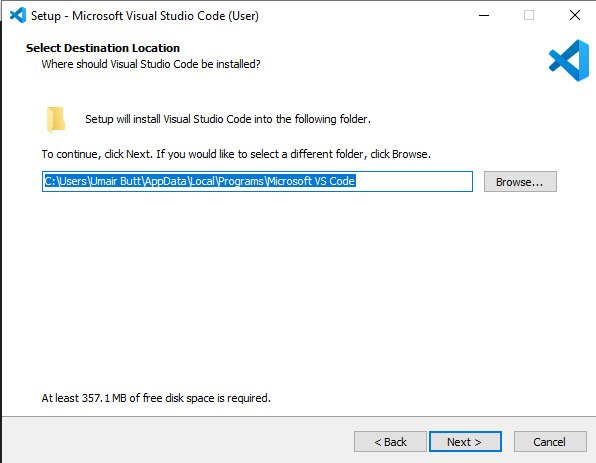
Once the setup is downloaded, please start this setup file, now read the entire license agreement, and select “I accept the agreement” option

Now select the drive where you want to install the software, we recommend installing it in the windows directory drive
Now select the Start menu folder

Now if you want, you can select some additional steps

now ready to install window will appear and just proceed with the install button. Now the Visual Studio code has been successfully installed.